
Monday, April 29, 2013
Wednesday, April 24, 2013
Weapon-Hi Poly


Monday, April 22, 2013
this is one of those moments/days where i haven't posted any sketches within my sketchbook or digitally in awhile. The reason being because i have alot of zbrush assignments to work on and ive been focusing strongly on my portfolio and alot of concepting behind these portfolio pieces. But i definitely have some art pieces to post up soon.

Sunday, April 21, 2013
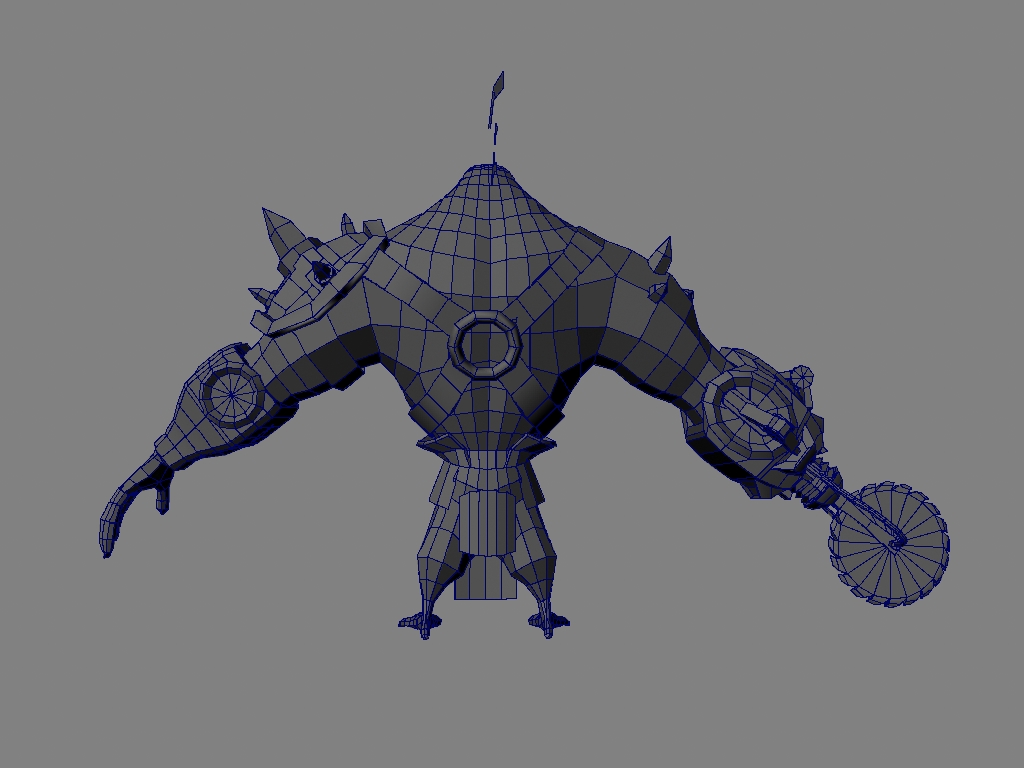
Agronian Warior Low Poly Wireframe


Thursday, April 18, 2013
Compositional Study 2

Wednesday, April 17, 2013
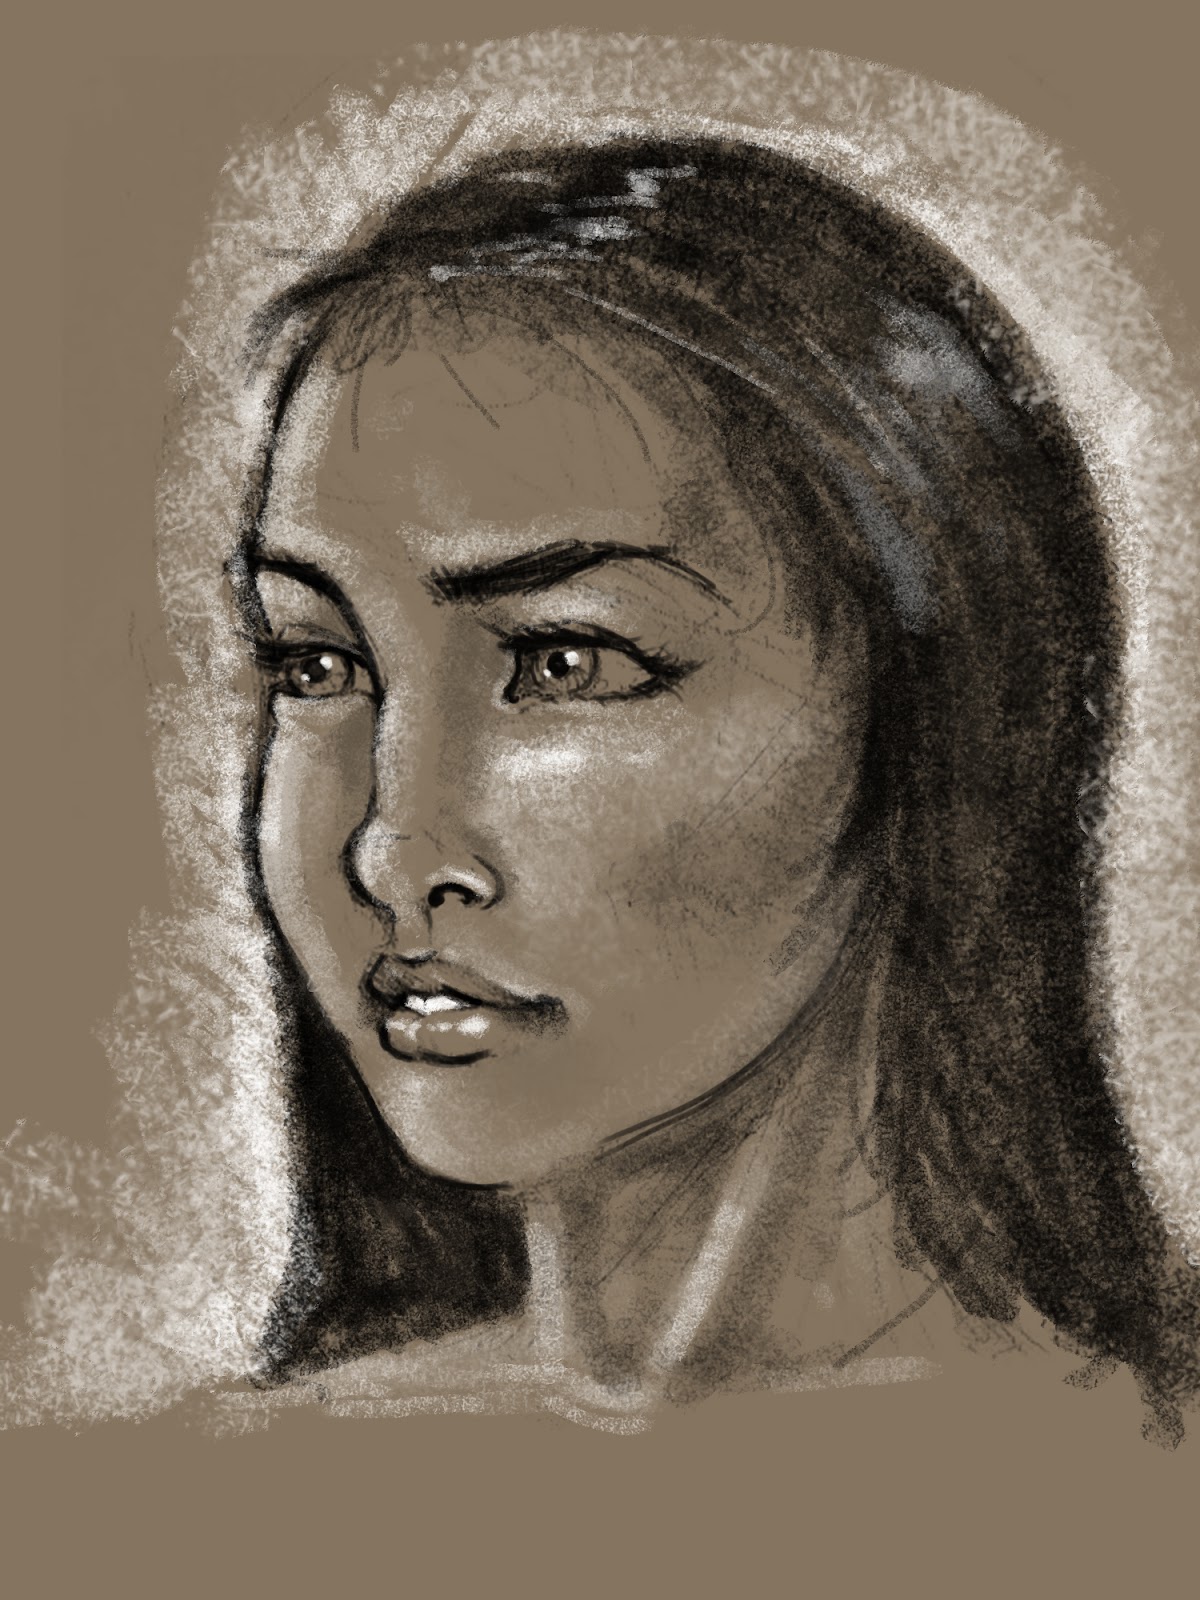
Character Portfolio Piece
ive began sculpting the base mesh of my first portfolio piece. My first 2 projects for my portfolio will be characters and the rest ....will be announced later :) but here's a paint over i did of my base mesh to get an idea on what i want my character to look like!


it's based off of an Greg Baldwin's conceptual work that he did for Insomniac Game's Ratchet and Clank! So i did a redesign of it to keep the character proportions as previously done. Though im trying to make this piece follow the company's art style. There's about 3 pages within my sketchbook of thumbnails, and concepts so i'll upload that another time.
maya low to high baking process


enable a normal map transfer and use the desired settings (all i changed were the map resolution and sampling quality if necessary)


tips ive learned with doing this:
make sure the low is unwrapped properly
avoid 90 degree angles
if necessary, modify the distance between the low and the high if the transfer didnt go successfully while they were perfectly aligned
bonsai tree project


so i finished the bonsai tree and manage to fix the issues necessary within the exports. one thing i have to work on is realistic/asymmetrical elements. I have a better idea of storyline when texturing/modeling but when it comes to something realistic towards a tree, i could use more branches in areas i havn't done so. So as explained in class, i have the common y shaped branch when i could have maybe branches on my branch's branches (inception D:) but yeah, now im approaching another hand painted model but this time it'll be a weapon for one project and a character for the final along with a scenery if i can get to it :)
for my portfolio classes im having another 2 characters at the moment. man this quarter is just fillledddd with characters but i think characters gives me a good opportunity to do some detailing in zbrush and keep my mind exercised and aware on how to do proper baking from high to low poly models in multiple options.
Monday, April 15, 2013
FIXED normal's seams
turns out all i had to do was flip the green channel of my normals -___- for EVERY xnormal's normal bake. haha . I did so many methods to try to fix this:
changing the UVs
checking the normal's face direction
checking/unchecking almost every box in the import and export option
UDK material editing like uv texture coordinate adjustments and so on
adjusting smoothing groups in max
MULTIPLE bakes
baked through xnormals, baked through zbrush,
and MANY more
and allll it took was a simple green channel flip? it turns out that xnormal's normal bakes will commonly have to have the green channel flip...so hopefully if anyone runs into this problem like i did and reads this, here's one option to fix it :D and if it doesnt fix it......good luck :) ask me if anything though.
to fix

it's common through xnormal's base texture to bake options.
problem fixed?
i believe i found the problem to the UV seams within my object (which is a small mistake i made on accident and i dont know how i forgot this step when exporting my filees). i'll post an update soon when i get ahold of a pc to edit this but atm i have work to attend.
debugging . . .


beeng having this crazy issue with udk when importing my bonsai tree....my UVs are decent, i did a super basic light map (LITERALLY just a flatten map and sent to udk) and this is what i get. though it's not bad with my maps quickly placed in marmoset o.O
Saturday, April 13, 2013
Game Map

just posting a map for a level of a game im creating soon within UDK. here's the basic layout.
Tuesday, April 9, 2013
Bonsai Tree WIP

Monday, April 8, 2013

adding detail


Sunday, April 7, 2013
Bonsai Tree

Advance Level Design Final

Saturday, April 6, 2013
My Wallpaper

Black Cat Sculpt Update


Friday, April 5, 2013

Thursday, April 4, 2013
Wednesday, April 3, 2013

Tuesday, April 2, 2013


Subscribe to:
Comments (Atom)
Who i am
- Travis Ngov
- Rancho Cucamonga, California, United States
- 3D artist and recent grad from the Art Institute of California - Inland Empire.